Ok, you finally got to see some results, but how can you be sure that that our field is indeed made of small blocks, and that all this code didn't just produce a big blue rectangle? Easy. In this chapter, we'll add some code that'll display a grid on our field, and then we'll try to change the color values in our blocks. Just to be sure everything works. We'll add another control to our form. A check box that we'll use to show or hide the grid. To add it to the form, double click on the 'Check Box' control in your Tool Box, and then set it's Properties like shown in the next table:
CheckBox
- (name): cbGrid
- BackColor: Web > Transparent
- Location: 490;116
- Text: Show Grid
Since we've already added a 'using' statement for Drawing2D library, we'll be able to define our custom pens in our code for displaying the grid. Again, go trough the code, type it on your own, and read the comments. (I hope you're not retyping all of my comments ;) – write your own – in a way that you'll understand.)
This is the code that you have to put inside the DrawGrid() function:
// Checking if the check box
// is checked or not. If the
// checkbox is checked – then
// we'll display the grid.
// The grid is made up from 9
// horizontal and 14 vertical lines.
if (cbGrid.Checked == true)
{
Graphics gGrid = picGameField.CreateGraphics();
// We'll create our custom PENS:
// Pens hold the information about
// color, line style and other
// graphical properties that are
// usefull for drawing shapes.
// Pen that we'll use for horizontal lines:
// Here we define our pen as 'Sky Blue',
// and that the line drawn will be
// 1 pixel in width:
Pen pLineH = new Pen(Color.SkyBlue,1);
// Here we define that the line will be
// drawn with a series of little dashes:
pLineH.DashStyle = DashStyle.Dash;
// Next, the code for our Pen that we'll
// use for our vertical lines.
// Note, that we could use the same pen
// for both horizontal, and vertical
// lines, but that would mean that, they
// would have the same color and style.
// To spice things up, I've decided to
// make them a little different.
// So once again:
Pen pLineV = new Pen(Color.DeepSkyBlue, 1);
// This pen will draw line with a
// series of small dots:
pLineV.DashStyle = DashStyle.Dot;
// Finally, let's draw our vertical lines:
// Again, we'll draw them in a loop,
// so we don't have to write 13 almost the
// same lines of code.
for (int a = iFieldSize; a < (iFieldSize * iWidth); a = a + iFieldSize) { gGrid.DrawLine(pLineV, a, 0, a, iHeight * iFieldSize); }
// And horizontal lines:
for (int b = iFieldSize; b < (iFieldSize * iHeight); b = b + iFieldSize) { gGrid.DrawLine(pLineH, 0, b, iWidth* iFieldSize, b); }
Now, scroll to the butGame_Click method, and this code there:
(Add it before the call to the DrawField() method.)
// Defining a block:
// Field[vertical, horizontal] = color
Field[0,0] = 1;
Field[4,8] = 2;
Field[2,12] = 3;
// You can add some of your own here…
// Just be sure that the field
// coordinates are not out of range.
// This is the block with the maximum
// range (bottom right field):
Field[9,14] = 4;
And, add this code after the DrawField() call:
//Draw the grid:
DrawGrid();
After running the program, selecting the 'Show Grid' check box and clicking on the 'New Game' button, you should see something like this:

So, this is it for this chapter. In the next chapter we'll try to create a column full of new blocks, with randomly selected colors, and then show it in the first column on our game field.
When we wrote the code for our CreateField() method, we didn't write any code for displaying the field to the user. We'll do it in this chapter. We'll take a look at graphic programming, GDI+… So, let's fill our DrawField() method. Here's the code – go trough it, read the comments (the green stuff), and hopefully, you'll get it. :) I did write a lot of comments. I hope they help.
// Define a Brush – an object that will
// hold the color value for our Game
// Field background.
Brush Background = Brushes.PowderBlue;
// We want to show our field inside the
// Picture Box, so we create a graphich
// object inside our Picture Box.
Graphics gField = picGameField.CreateGraphics();
// We'll go trough all of our fields, and we'll
// display them one by one (taking into consideration
// the color value each field contains). We have 150
// fields, so, we'll do this with the help of two loops.
// It woud be painfull to do it manually.
// First loop that is going trough every line.
for (int v = 0; v <>
{
// Second loop – this one is going
// trough every column.
for (int s = 0; s < iWidth; s++)
{ // We define a small rectangle, for
// every field in our game field. We'll
// use the variable that contains the
// rectangle's width/height. If you
// remember, we defined it in our first
// lines of code.
Rectangle rtgField = new Rectangle
(s * iFieldSize, v * iFieldSize,
FieldSize, iFieldSize);
// First of all, we'll fill our rectangles
// with our background color.
gField.FillRectangle(Background, rtgField);
// And now, we'll fill the field with the color
// that is defined with the fields value.
switch (Field[v, s])
{
case 0:
// Draw empty field...
break;
case 1:
// I've decided that color #1 is Blue. So, if
// the field holds a value of 1 – We'll color it
// blue. And we'll do the same for all
// other colors.
gField.FillRectangle(Brushes.Blue, rtgField);
break;
case 2:
// If the field contains value 2:
// we'll fill it red.
gField.FillRectangle(Brushes.Red, rtgField);
break;
case 3:
// If the field contains value 3:
// we'll fill it green.
gField.FillRectangle(Brushes.Green, rtgField);
break;
case 4:
// If the field contains value 4:
// we'll fill it yellow.
gField.FillRectangle(Brushes.Yellow, rtgField);
break;
case 5:
// If the field contains value 5:
// we'll fill it purple.
gField.FillRectangle(Brushes.Purple, rtgField);
break;
case 6:
// If the field contains value 6:
// we'll fill it black.
gField.FillRectangle(Brushes.Black, rtgField);
break;
case 7:
// If the field contains value 7:
// we'll fill it orange.
gField.FillRectangle(Brushes.Orange, rtgField);
break;
case 8:
// If the field contains value 8:
// we'll fill it gray.
gField.FillRectangle(Brushes.Gray, rtgField);
break;
case 9:
// If the field contains value 9:
// we'll fill it dark blue.
gField.FillRectangle(Brushes.DarkBlue, rtgField);
break;
case 10:
// If the field contains value 10:
// we'll fill it pink.
gField.FillRectangle(Brushes.Pink, rtgField);
break;
default:
// If our program comes to this point of the code,
// something's gone wrong! ;) XD
break;
}
}
}
Now, you're just a few steps away from seeing it on the screen. Go back to your Design View by clicking the tab 'frmMain.cs [design]' on top of the code window. Double click on the 'New Game' button, and you should wind up right back in the 'code' window. But, this time, you'll see some extra lines of code that were generated by the VS.net. The new lines are:
private void butGame_Click(object sender, EventArgs e)
{
}
Add this line of code in between the two curly brackets:
DrawField();
And run your game! (Click on the green 'Play' button in your toolbar). Click on the button, and you should see this:

In the next chapter: We'll fill our CreateGrid() function, and play a little with our blocks... :)
For me, writing code is the best part of a game development process. Some people like crossword puzzles, I like writing code. So, to start writing code, we have to find the code editor. Easy. Go to your Solution Explorer window, right-click on the 'frmMain.cs' and select 'View Code'. That should show you the code editor. And, it's not empty! ;)

Note:
TestApp is the application name I wrote in the new project dialog.
I won't get into explaining what's all this stuff. For now. I hope you'll figure it out trough the course of this tutorial. Right here in the beginning, we'll create some empty functions. Later on, we'll fill these functions with code. We'll also put in a couple of extra using statements. Just so we don't forget them later on... So, go to the top of your code window, and add the next 'using' statements there:
using System.IO;
using System.Drawing.Drawing2D
This will let us read and write files from the hard drive, and let us play with some nice graphic features, later in the project. Be careful, C# is a case sensitive language (unlike Visual Basic, for example), so make sure you watch that shift key of your's. ;) Now, let's add all those functions that we'll need. We'll put them inside of the public partial class frmMain : Form. You can see that there's already one in there: public frmMain(). Every function has an opening bracket {, and a closing bracket }. The function's code comes in between those brackets. So, move your cursor after the frmMain()'s closing bracket, and add new functions like this:
public void CreateField()
{
}
public void CreateNewColumn()
{
}
In the same way add the next functions. (don't forget the curly brackets). ;)
private void MoveRight()
private void GameOver()
private void DrawField()
private void DrawGrid()
private void CheckConnected()
private void CheckAll()
private bool CheckIfInList()
private void DestroyBlocks()
private void GoGravity()
private void NewGame()
private void NewLevel()
private void DoTheScoreMath()
private void DropBlock()
private void LevelScore()
private void HighScore()
private void Redraw()
private void Splash()
So, let's start off with our Game Field code. First of all, we need to tell the computer that we want a field of 15 columns with 10 rows. Ok. Let's write some code that will declare a couple of variables:
// Variable declarations:
static int iHeight = 10; // Game field Height
static int iWidth = 15; // Game field Width
static int iFieldSize = 32;// Block size, in pixels
This code will define our game field width, game field height and the size of every little field (block) in the game field. But, where to put this code?
Put it between:
public partial class frmMain : Form
{
and:
public frmMain()
I would suggest that you don't just copy and paste the code. Writing it on your own will help you understand it, and you'll see how Visual Studio helps you with auto-complete dropdown. You probably noticed the green part of the code - the double slashes let our compiler know that lines starting with them are actually comments, and they do not affect our program execution.
Ok, so, we declared the width, the height, and field size. But that doesn't tell our program much. So, we'll declare our fields now. (Remember the drawing in chapter 4?) So, here's two more lines of code - put them after the lines you just wrote.
//Declare Fields as an 2D array
int[,] Field = new int[iHeight, iWidth];
This line actualy tells the application that we'll be using Field[x,y] format to work with our blocks. We can now add values to every field. And the next step is to create a function that will fill all of the fields with value 0. Zero means that the field is empty. This is the code we need to put in the CreateField() function (between the function's opening and closing curly brackets):
// Function that clears the game field.
// Do this for all rows
for (int x = 0; x < iHeight; x++)
{
//Do this for all columns
for (int y = 0; y < iWidth; y++)
{
//Clear the fields:
Field[x, y] = 0;
}
}
Ok, we have the code that creates an empty game field now… But, our game field is hidden somewere in our computers memory. In the next chapter, we'll make our application show us our game field on the form we created.
Game Field!If you would buy a game of Monopoly in the 'real' world, you'd probably get a box, some playing figures, dice, bonus cards,property cards, game money, rule book and a game board. A lot of the similar stuff, like dice and game board, can be found in other 'regular' games. So, it would be logical to assume that computer games need similar 'components' to work. Yes, we'll make some of this stuff in our PC game. The first thing is to make a game board, or a game field, as I call it. Our game will use a big game field made of small fields. We'll create a field 15x10 in size. 15 columns and 10 rows. Each of the small game field blocks will hold one Block, Bubble, Baloon, whatever...
Here's the idea:

Ok, you probably get the idea now. Our game field is, basically, a bunch of blocks. Each block is defined with it's coordinates and a value (in this case, representing a speific color). So, how to make our empty form show something like this?
First add the next controls to the form:
(You can drag them from the tool box onto the empty form)
- Picture Box
- Button
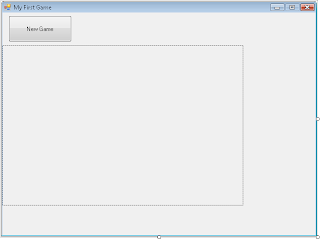
Now we'll fine-tune some properties for our new controls. In the Properties window, on the left, there is a huge list of properties you can adjust. Click on your Form and and tweak the properties to the values shown in the next list:
Form - frmMain
- FormBorderStyle: FixedSingle
- MaximizeBox: False
- Size: 630; 470
- StartPosition: CenterScreen
- Text: My First Game
This will disable resizing of your form, set it's size and start position, and write 'My First Game' in the title bar. Ok, moving on - select the button, and set it's properties:
Button
- (name): butGame
- Location: 12; 6
- Size: 126; 53
- Text: New Game
And for the end, select the picture box and, again, set it's properties:
Picture Box
- (name): picGameField
- BackColor: Web>Transparent
- Location: 0; 65
- Size: 480; 320
Your form should now look like this:
Don't forget to save your work!
This section of the tutorial will show you how to create a new Project in C#, so we'll be able to start programming. You can skip this part if you already know (or figured on your own) how to do this. The procedure is fairly simple. Just follow the next few steps:
1. Open your C# 2008 Express Edition (or whatever you have installed)
2. Click File > New Project
3. Select Windows Forms Application (or similar)
4. Enter the Name of your new application
5. Click Ok
Following these steps should give you a screen similar to this one:

So, let's take a quick look on the screen:
In the center you have an empty Form. This is where you design how your application will look, and eventualy this is where you'll write your code. On the left, there is a ToolBox with various controls you can drag onto your form to give it some funcionality. On the right, you'll find the Solution Explorer and the Properties window. On the bottom of the screen you'll see your Error List / Debugging window where the studio will show you all needed information about your program. Before moving on, go to your Solution Explorer window, right click on 'Form1.cs', select Rename, and enter 'frmMain.cs'. And finally, save your project.
First thing's first:
To make a good game - you'll need a good idea.
Ideas are best when you get them on your own. If you're not very creative - steal someone else's. :-P You'll come up with your own - eventually... :) For this tutorial I used an idea from a on-line flash game called 'Gold Strike'. The game was fun... And while playing it - I figured out that I could program a game just like that one... More or less.
So, here's a screenshot of the flash game 'Gold Strike':

Well, the point of the game is to destroy blocks/bubbles. They appear in the first column on the left, and move to the right. The player can destroy only those blocks that are adjanted to the blocks of the same color. Blocks can't float - because of that - we'll have to create some gravity. The game's over when the blocks reach the player, and there's no space for new columns. There are a few other additional rules... Like, levels: When to move to the next one?, What happens in the next one? Bonuses... And so on... But we'll come to this when time comes.
 A screenshot of the VC# Express ED;
So, what do you need to follow this tutorial?
This tutorial is based on Microsoft's Visual C#, wich is a part of Microsoft's Visual Studio. I guess that any version of C# will do. I've tried my code on two machines: One with MS VC# 2005 Proffesional Edition, and one with MS VC# 2008 Express Edition installed. And it works just fine on both of them. So, my advice to you would be to go to Microsoft's web site and download the latest C# Express Edition. Yes - It's FREE! And no, it's not a demo. It's a fully funcional development tool for personal use. Once you download and install C# - you're ready to rock!
(the URL is www.microsoft.com - in case you didn't know ;)
Where to begin?
First, open that freshly installed C# and look around... Try to familiarize yourself with the interface. The next thing would be to get a notebook - an old fashioned one, and a couple of pencils... They help you organise your thoughts. ;) And that's it. We're ready to design our first game.
 First of all - Welcome!
In this tutorial, I'll try to guide you trough a game development procecss. There are a lot of articles on game programming, but - I found most of them too complex. Or uncomplete. Don't worry - In this article, I'll go from the beginning. You don't need ANY game development OR programming knolege whatsoever. I'll try to cover it all. Step by step. In the end, I guess, you'll know a lot about programming and game development - and you'll have a fully functional game in your hands. And, yea, I won't go into theoretical details for every little thing... just for those things that we'll need to create a nice game. Oh, and one more thing - excuse my loose language. I'm not a very formal person. :)
Note:If you're not a total novice - just ignore the parts of this article that would treat you as one. ;) And one other thing - I'm a total newbie at game & C# programming. :-P So, enjoy the tutorial :)
The image above is an actual screenshot of the game I've createt in the process of writing this tutorial. If you follow this tutorial to the end - your game will look exactly the same!